Plumbed her in (FINALLY!)
So, I hardly ever post here - need to fix that! I actually let my machine sit dormant for about a month or so (GASP!). I was doing lots of drip coffee as I wasn't at home as much in the morning and I could set the timer to be ready when I got up in the morning. Well, I've recently switched jobs (back to my old company) and so I spend some mornings around the house so I'm back to pullin' shots and roastin' coffee!
I actually was fortunate enough to get the direct plumb in kit from Chris' Coffee for Christmas and it has sat in my office for the last 6-7 months. Last night I decided enough was enough, it was going to happen!
The directions are pretty clear although if there was a link to it on Chris' webpage, it would be helpful (with bigger, clearer pictures). Even without that, I managed to do the job in just a few hours. Chris SHOULD provide a disclaimer though; I cut my damn hands TWICE on the sharp edges of the machine. . . NOT a happy camper!
So you start by putting a solenoid valve on the back panel. It attaches very easily and then you just have to reroute some tubing, disconnect some wires and jump a few others. After that, you are 1/2 way home!
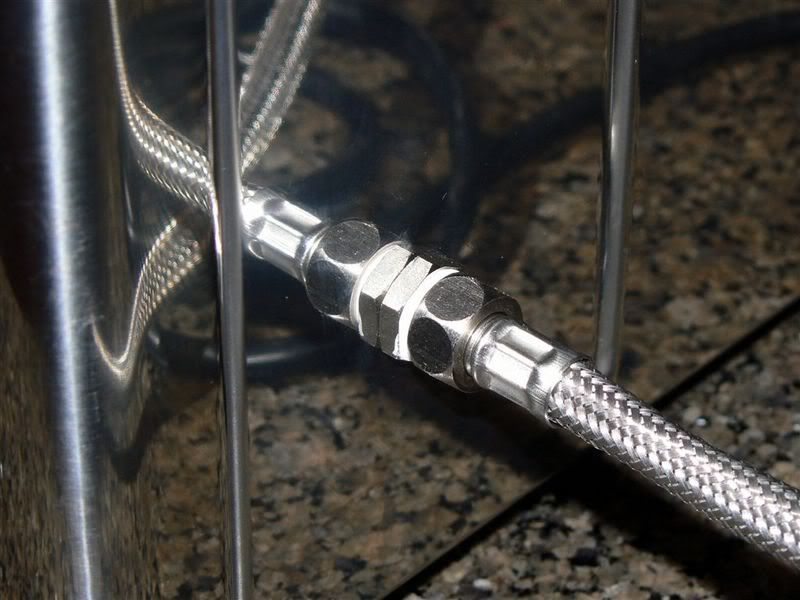
The source for water going into the machine:
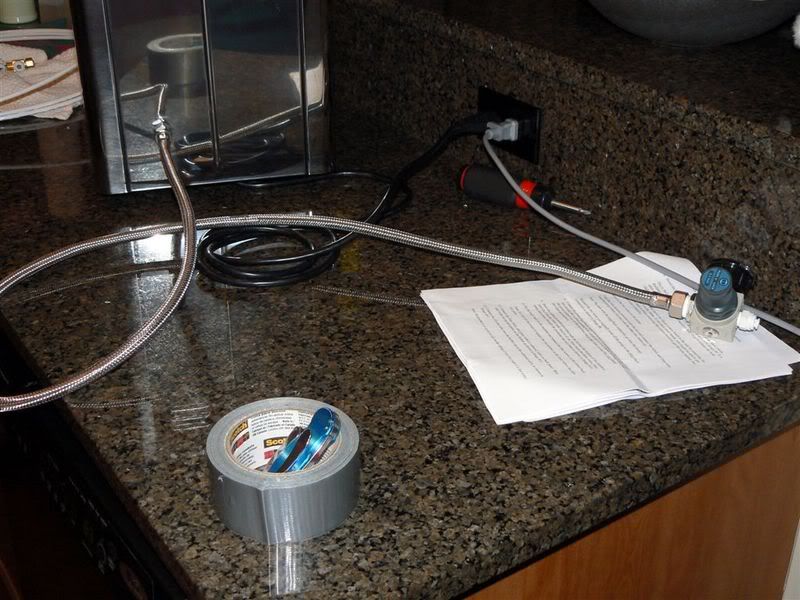
My work area:
The solenoid valve, some jumped wires and the water tubing (no more tank!):

So, that is finished, now just to move the fridge and add a "splitter" from the wall to the ice maker. . .right?
WRONG!
Thought that would be the easiest way, but the fittings Chris sent were not the same size so I have to go to option #2 - plumb in from under the sink (Grrrr! Hoping to avoid that!).
Because of the set up of my kitchen, I will have to run the water from under the sink, through two cabinets, out the side of one and on up. None of this will be visible, so it won't be an eye sore - but it makes for a lot of work. Also, because the cabinets are on an angle - it is gonna be tricky to get it "threaded".
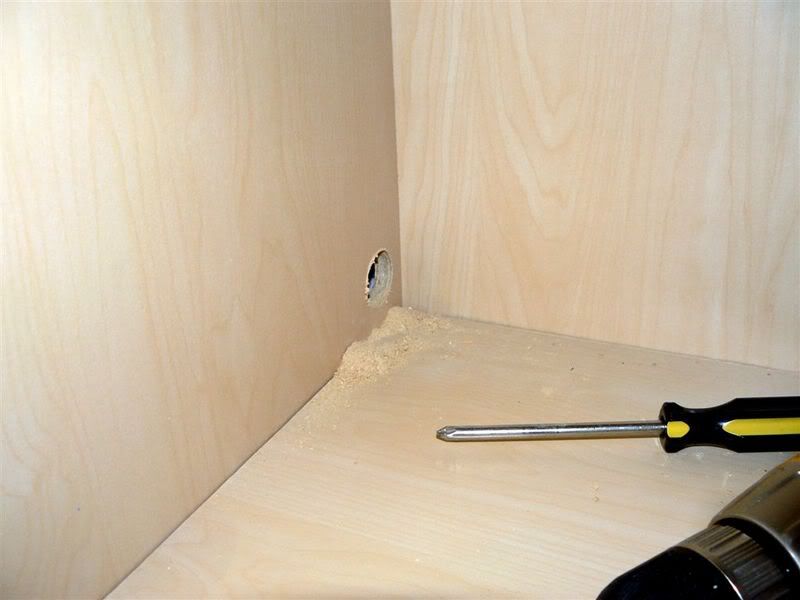
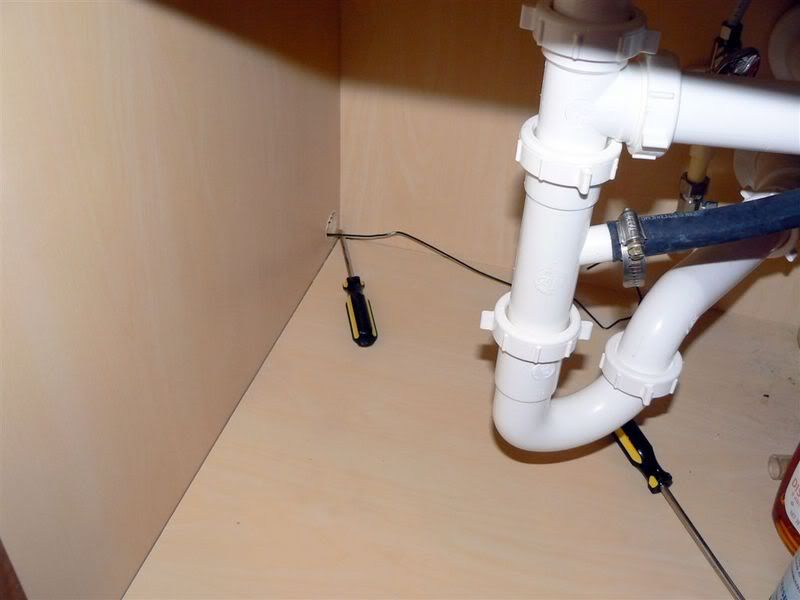
I started by moving a dozen or so empty or almost empty Glass Plus containers from under the sink to make room. After that, I started drilling through the sides of the cabinets:
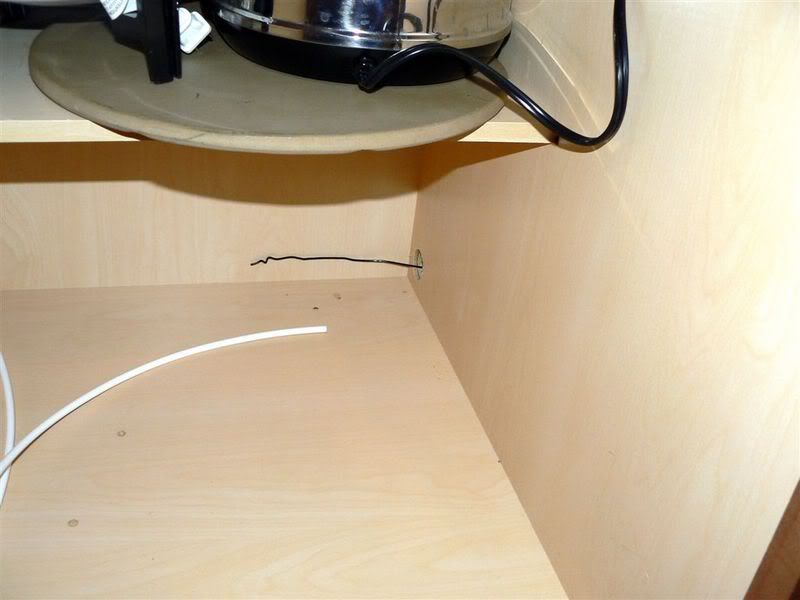
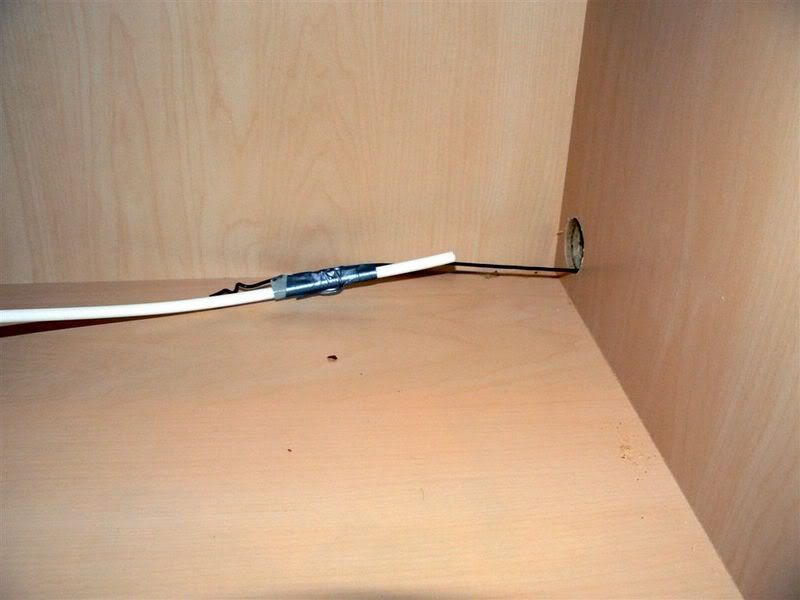
I THEN spend the next 10+ minutes trying to stick a coat hanger through two of the holes to get the tubing through.
Once through, I used what eles? DUCK TAPE! (You can add this to the 1,000,001 uses list!).
A little tug and:
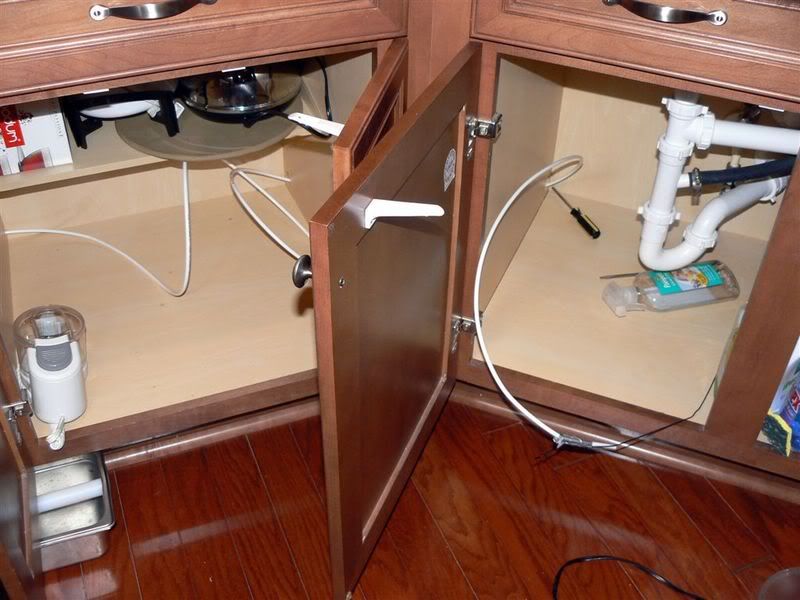
After that I disconnected the cold water supply to my faucet, added the splitter, reconnected, checked for leakage, and plugged the tube into the John Guest fittings (which work wonderfully!) and I was good to go!
The finished product:

What took me so long?
I actually was fortunate enough to get the direct plumb in kit from Chris' Coffee for Christmas and it has sat in my office for the last 6-7 months. Last night I decided enough was enough, it was going to happen!
The directions are pretty clear although if there was a link to it on Chris' webpage, it would be helpful (with bigger, clearer pictures). Even without that, I managed to do the job in just a few hours. Chris SHOULD provide a disclaimer though; I cut my damn hands TWICE on the sharp edges of the machine. . . NOT a happy camper!
So you start by putting a solenoid valve on the back panel. It attaches very easily and then you just have to reroute some tubing, disconnect some wires and jump a few others. After that, you are 1/2 way home!
The source for water going into the machine:
My work area:
The solenoid valve, some jumped wires and the water tubing (no more tank!):
So, that is finished, now just to move the fridge and add a "splitter" from the wall to the ice maker. . .right?
WRONG!
Thought that would be the easiest way, but the fittings Chris sent were not the same size so I have to go to option #2 - plumb in from under the sink (Grrrr! Hoping to avoid that!).
Because of the set up of my kitchen, I will have to run the water from under the sink, through two cabinets, out the side of one and on up. None of this will be visible, so it won't be an eye sore - but it makes for a lot of work. Also, because the cabinets are on an angle - it is gonna be tricky to get it "threaded".
I started by moving a dozen or so empty or almost empty Glass Plus containers from under the sink to make room. After that, I started drilling through the sides of the cabinets:
I THEN spend the next 10+ minutes trying to stick a coat hanger through two of the holes to get the tubing through.
Once through, I used what eles? DUCK TAPE! (You can add this to the 1,000,001 uses list!).
A little tug and:
After that I disconnected the cold water supply to my faucet, added the splitter, reconnected, checked for leakage, and plugged the tube into the John Guest fittings (which work wonderfully!) and I was good to go!
The finished product:
What took me so long?
posted by -T at 1:21 PM
13 comments
![]()
![]()
